
# Use Cases
This guide builds on the quickstart for Payment Components by covering additional use cases you may need to implement.
# Update payment amount during checkout
DETAILS
You may need to change the payment amount dynamically on your payment page. Scenarios include adding or removing items (opens new window) in the cart, changing the quantity of the cart items, changes in taxes (opens new window), applying a coupon (opens new window), or applying bundle offers. Follow these steps to implement dynamic amount changes:
# 1. Request to update the payment_intent (client)
As soon as the amount is determined, request your server to update the payment_intent (opens new window).
const url = "http://localhost:8082/payment-intent-update?amount=300";
const response = await fetch(url, {
    method: "POST",
});
if (!response.ok) {
    throw new Error(`Response status: ${response.status}`);
}
const json = await response.json();
2
3
4
5
6
7
8
# 2. Update the payment_intent (server)
Call Chargebee's update payment intent (opens new window) endpoint from your server to update the payment_intent.
curl  https://{site}.chargebee.com/api/v2/payment_intents/{payment_intent_id} \
     -u {site_api_key}:\
     -d amount=300 \
     -d currency_code="USD"
2
3
4
# 3. Update the Payment Component (client)
Use the update() method to remount the Payment Component with this change.
const paymentComponent = components.update({
    paymentIntent: {
        id: '{payment_intent_id}',
    },
});
2
3
4
5
# Customize field and label text for different languages
DETAILS
To deliver a fully localized and branded checkout experience, you can override the default translations on the Payment Components UI using the Chargebee Billing Language Pack (opens new window).
In the language-specific folder (such as en, fr, or es), open the internal/components.csv file. Then, update the value column to provide your custom translations for the relevant fields and labels in the Payment Components UI.
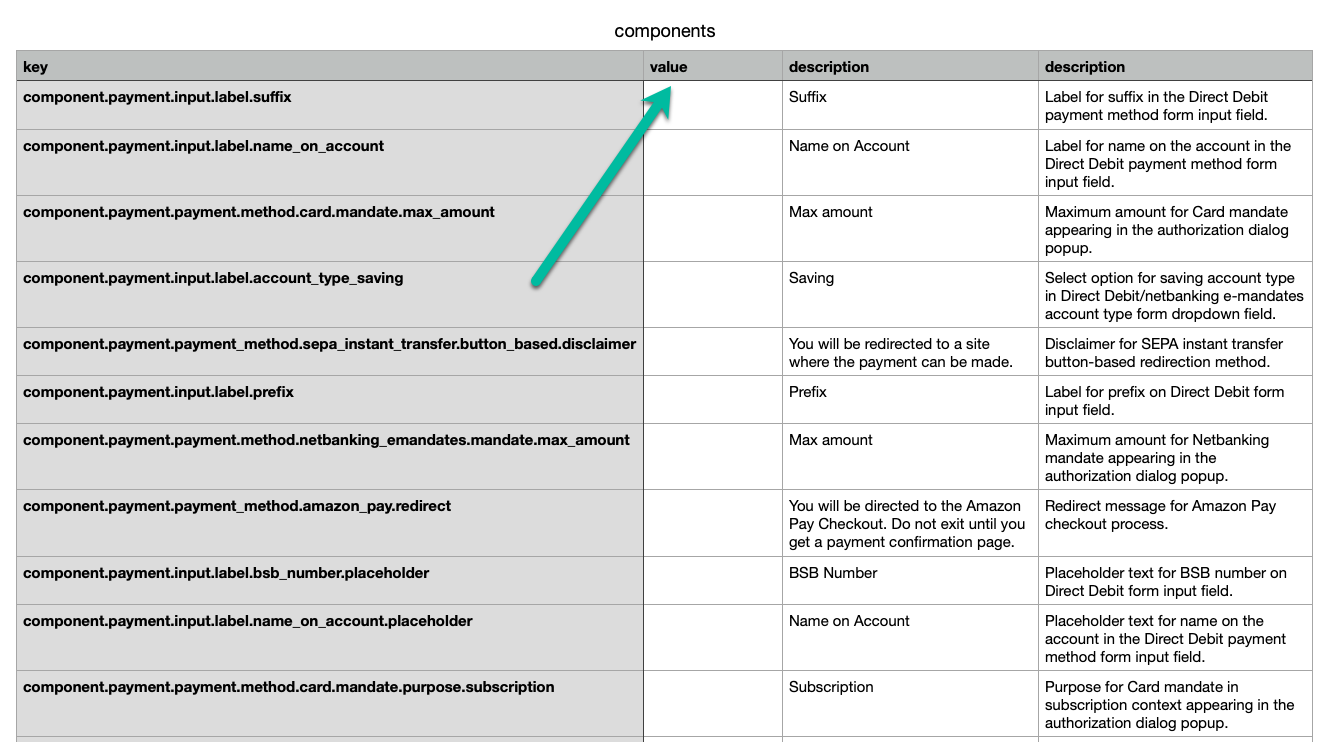
# Example: Customize the CVV label and placeholder
Update these keys in internal/components.csv:
component.payment.input.label.cvvcomponent.payment.input.label.cvv.placeholder
Example values:
- Label:
Security Code - Placeholder:
123
# The GoCardless payment button is too stretched
DETAILS
The Payment Button Component may look too stretched when using GoCardless. This is because the payment button always takes up 100% width of its parent container. When using GoCardless, set an appropriate class to the payment button host element. Select the class in CSS to control its size.
<!-- Set the class only when using GoCardless -->
<div id="payment-button" class="gocardless-button-host"></div>
2
.gocardless-button-host {
  width: 300px;
  max-width: 100%;
}
2
3
4
paymentButtonComponent.mount("#payment-button");
# Track typing or field changes in Payment Components
DETAILS
Typing or field-change events in Payment Components cannot be tracked by the parent page of the Payment Components iframe. This is because Payment Components run inside a cross-origin iframe.
To overcome this limitation, Payment Components provides the following callbacks:
- Payment method selected or changed (
onPaymentMethodChange) - Payment button clicked (
onButtonClick) - Payment authorization successful (
onSuccess) - Payment authorization failed (
onError)
Validate input fields
Use the validate() function to validate input fields in Payment Components.
