
# Payment Components
# Overview
Payment Components are prebuilt UI elements that provide input fields and buttons for securely collecting payment information from your customers. Payment Components support multiple payment methods in a single integration.
Use Payment Components when you build your own checkout experience but want to offload payment handling to Chargebee.
Upgrade to Payment Components
Payment Components now supersede the following Chargebee.js features:
# Where Payment Components fit
Payment Components are one of several ways to collect a payment through Chargebee. Which one you choose depends on how much of the checkout you want to build yourself.
A typical checkout moves through the following stages:
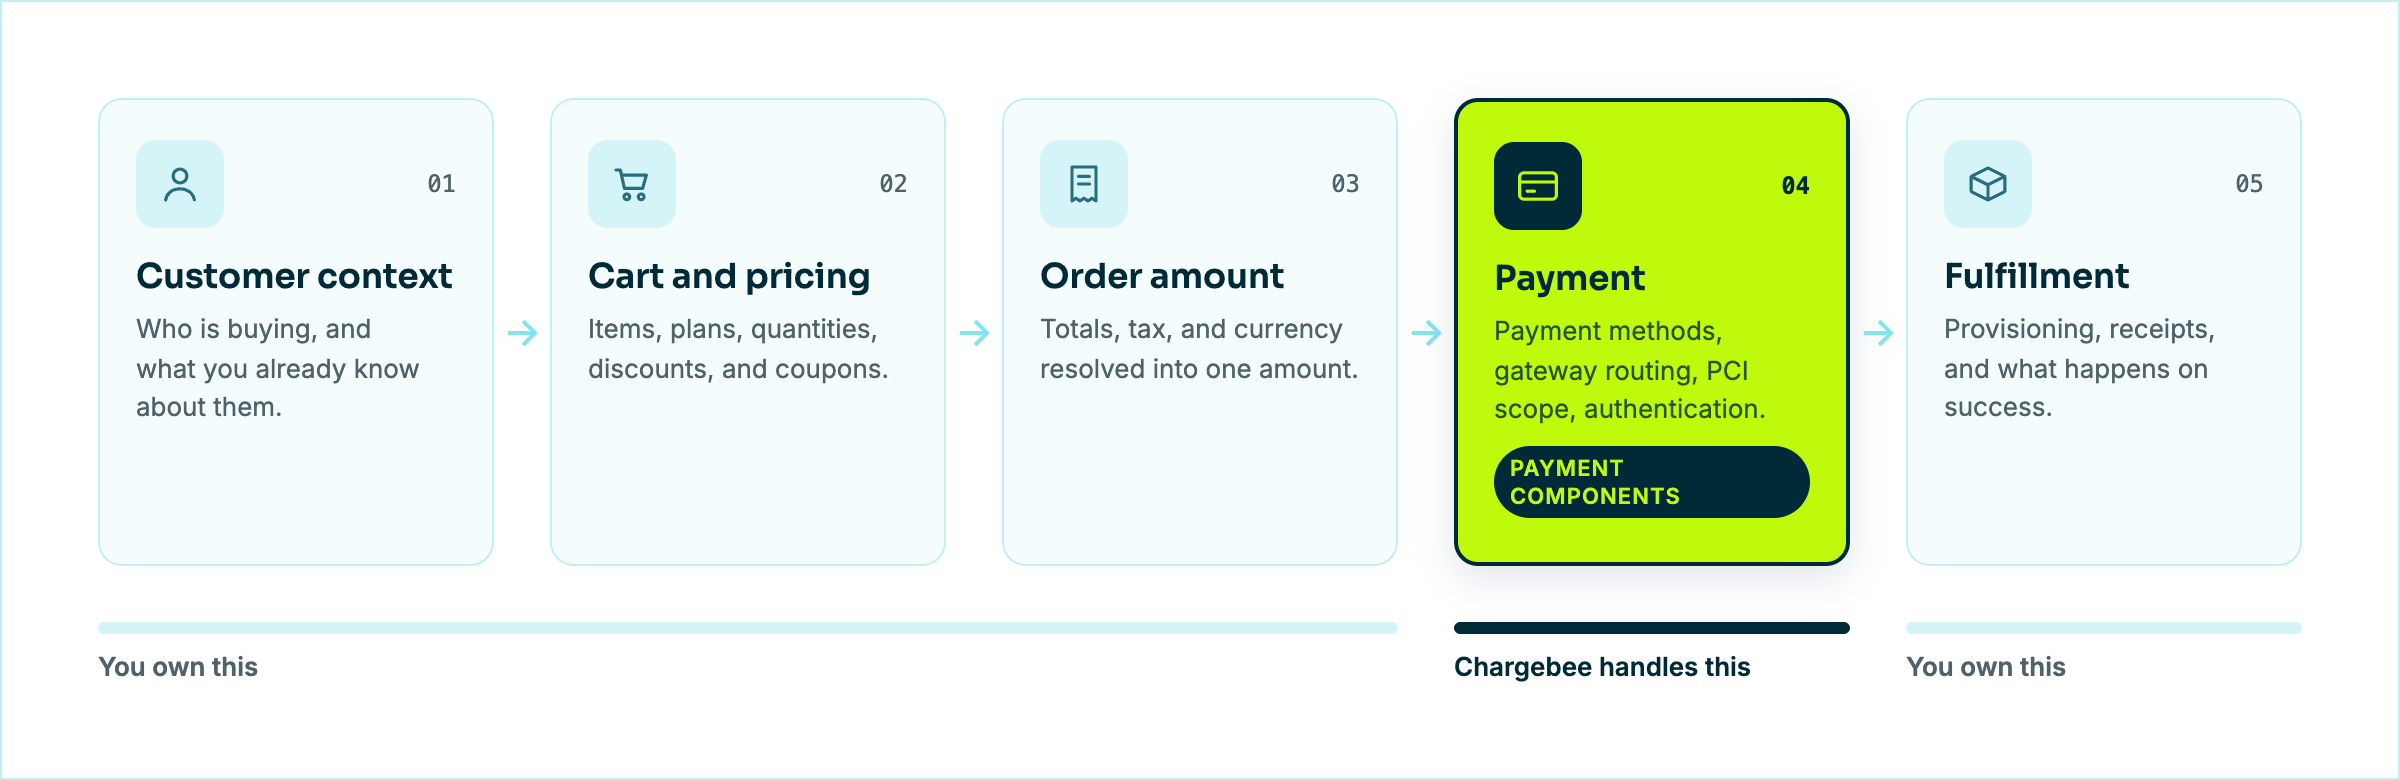
Payment Components handle the highlighted Payment stage. You own every other stage, including the cart, the pricing, and what happens after the payment succeeds.
Choose Payment Components when you build your own checkout UI and want Chargebee to collect the payment securely within it. You control the layout, the styling, and the surrounding page, while Chargebee handles the payment methods, gateway routing, PCI scope, and customer authentication.
Choose Chargebee's hosted Checkout when you want Chargebee to run the cart, pricing, tax, and payment together on a page that Chargebee hosts and maintains. This is the fastest route to a working flow because there is no checkout UI to build. See Hosted Checkout (opens new window) for what the hosted page covers, and Integration options (opens new window) for the ways to open it.
# Examples
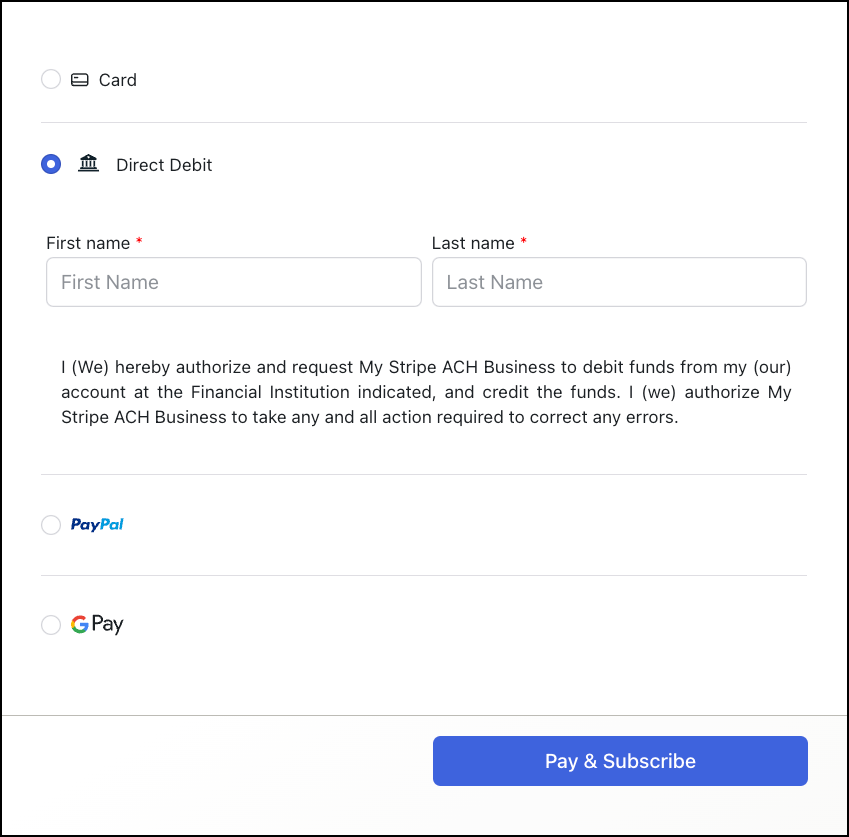
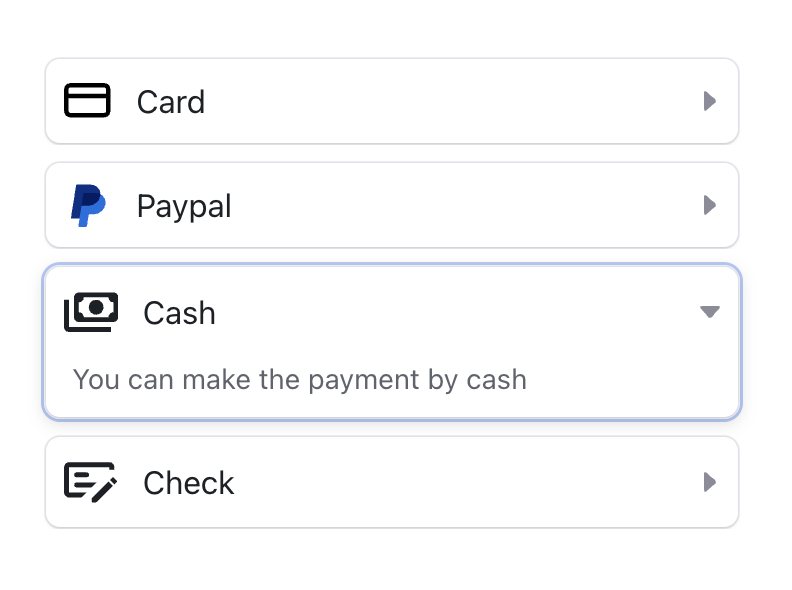
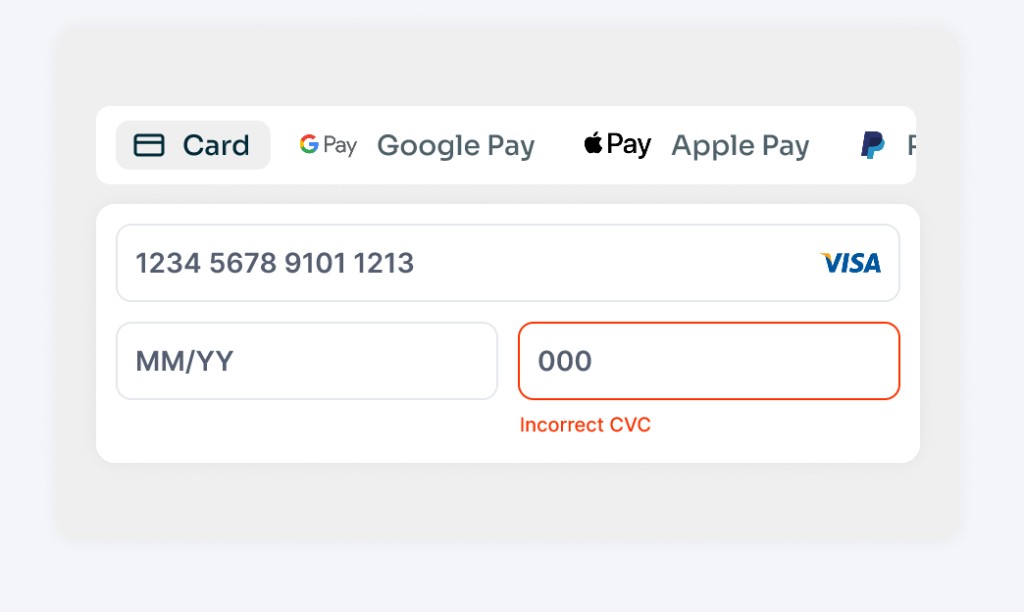
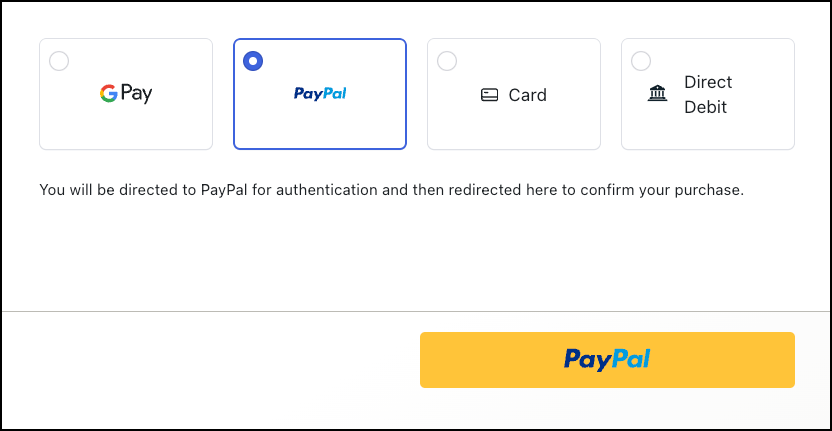
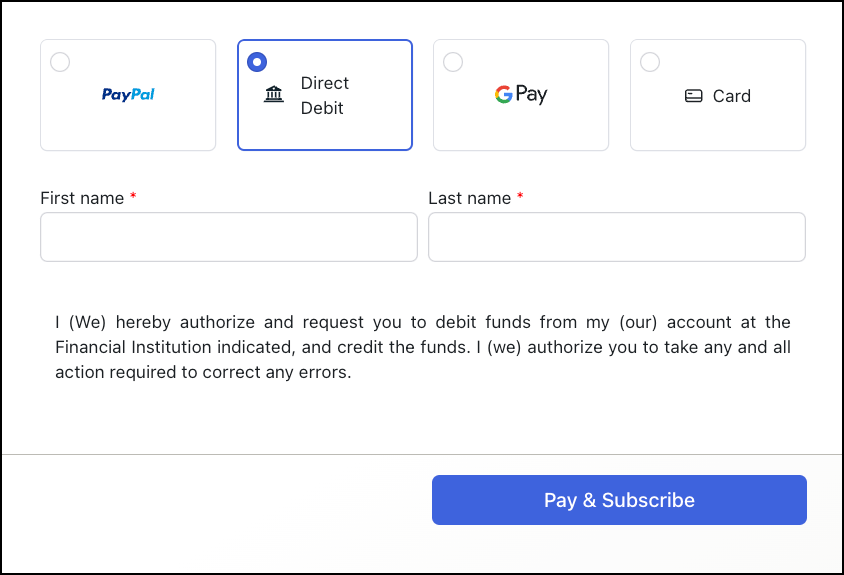
The following screenshots show Payment Components configured with different presentation options and various payment methods selected:
# Accordion layout
Multiple payment methods
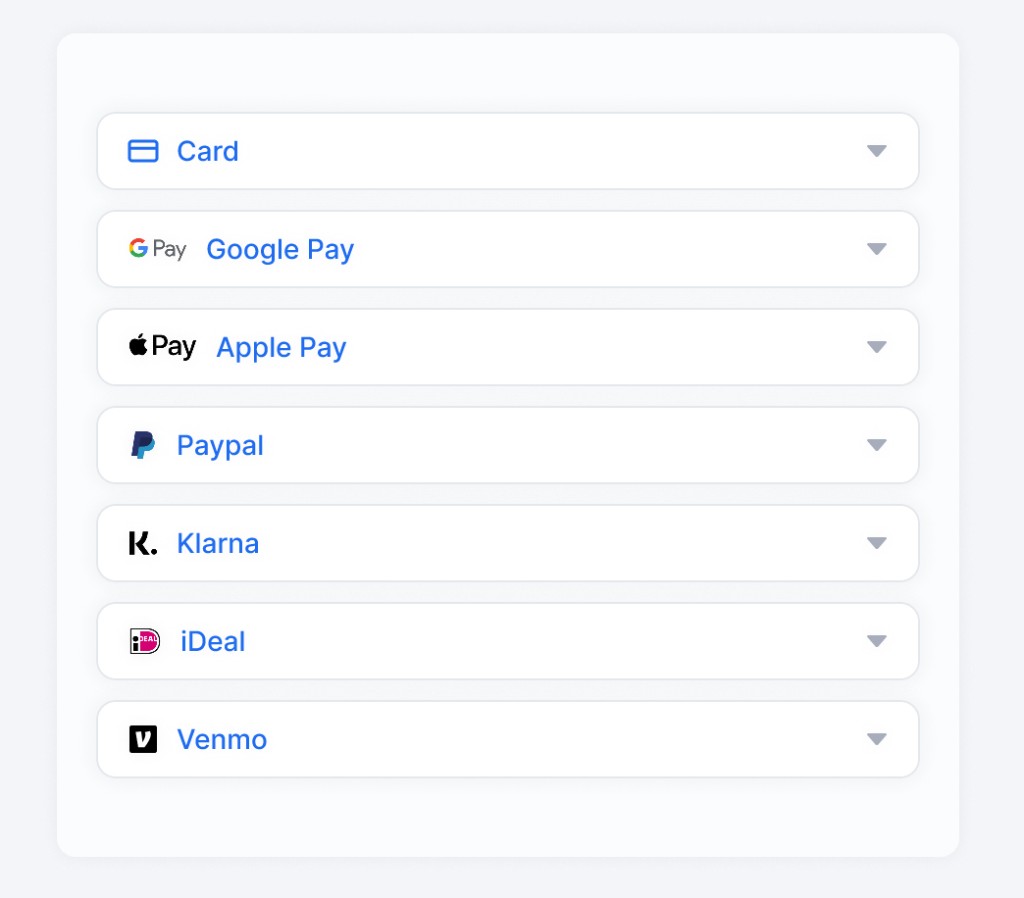
Card
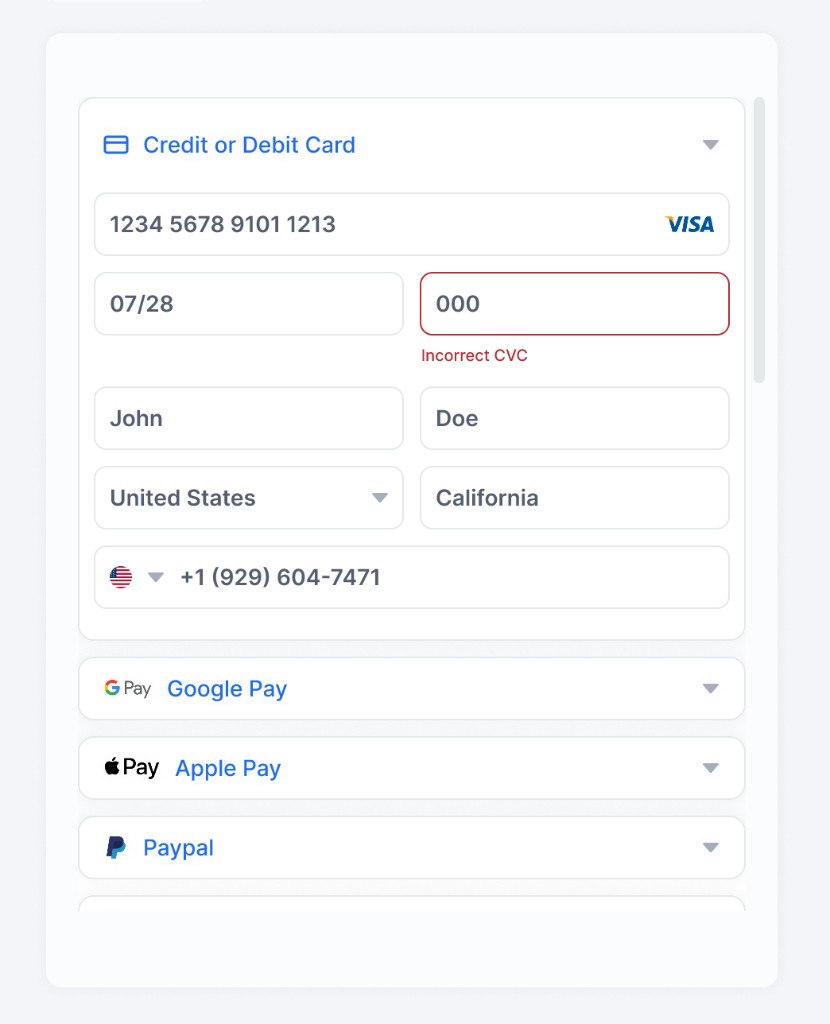
PayPal
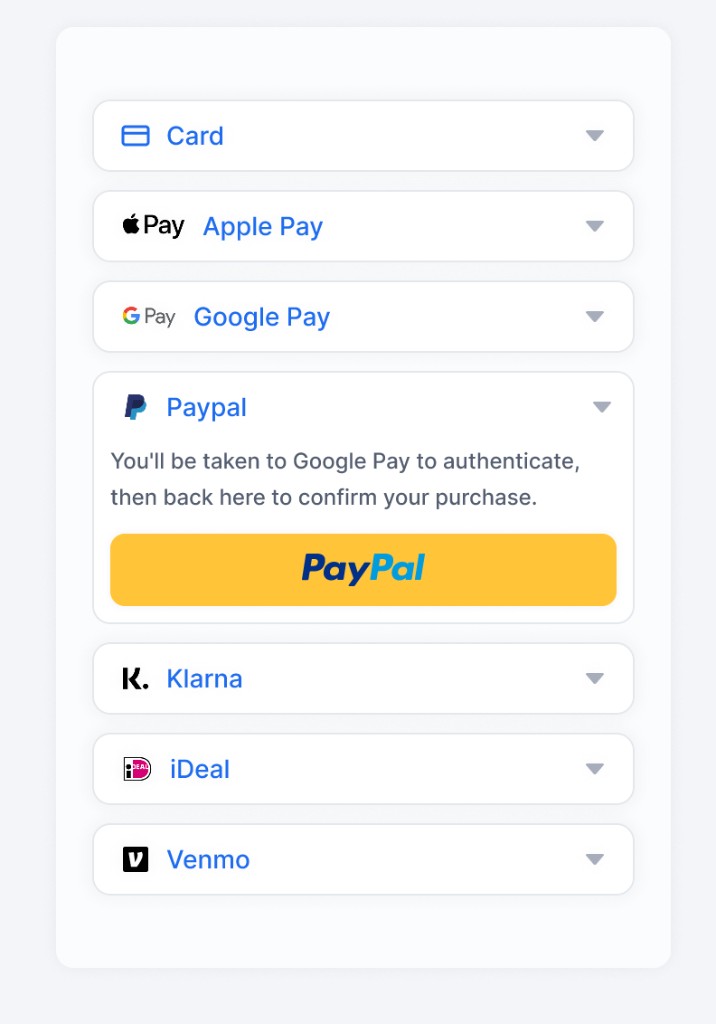
Direct Debit
Offline payment methods
# Tab layout
Card
PayPal
Direct Debit
# How Payment Components work
On the page, a Payment Component looks self-contained, but it sits in the middle of an exchange between your page, your backend, Chargebee, and your payment gateway. The following diagram traces that exchange end to end.
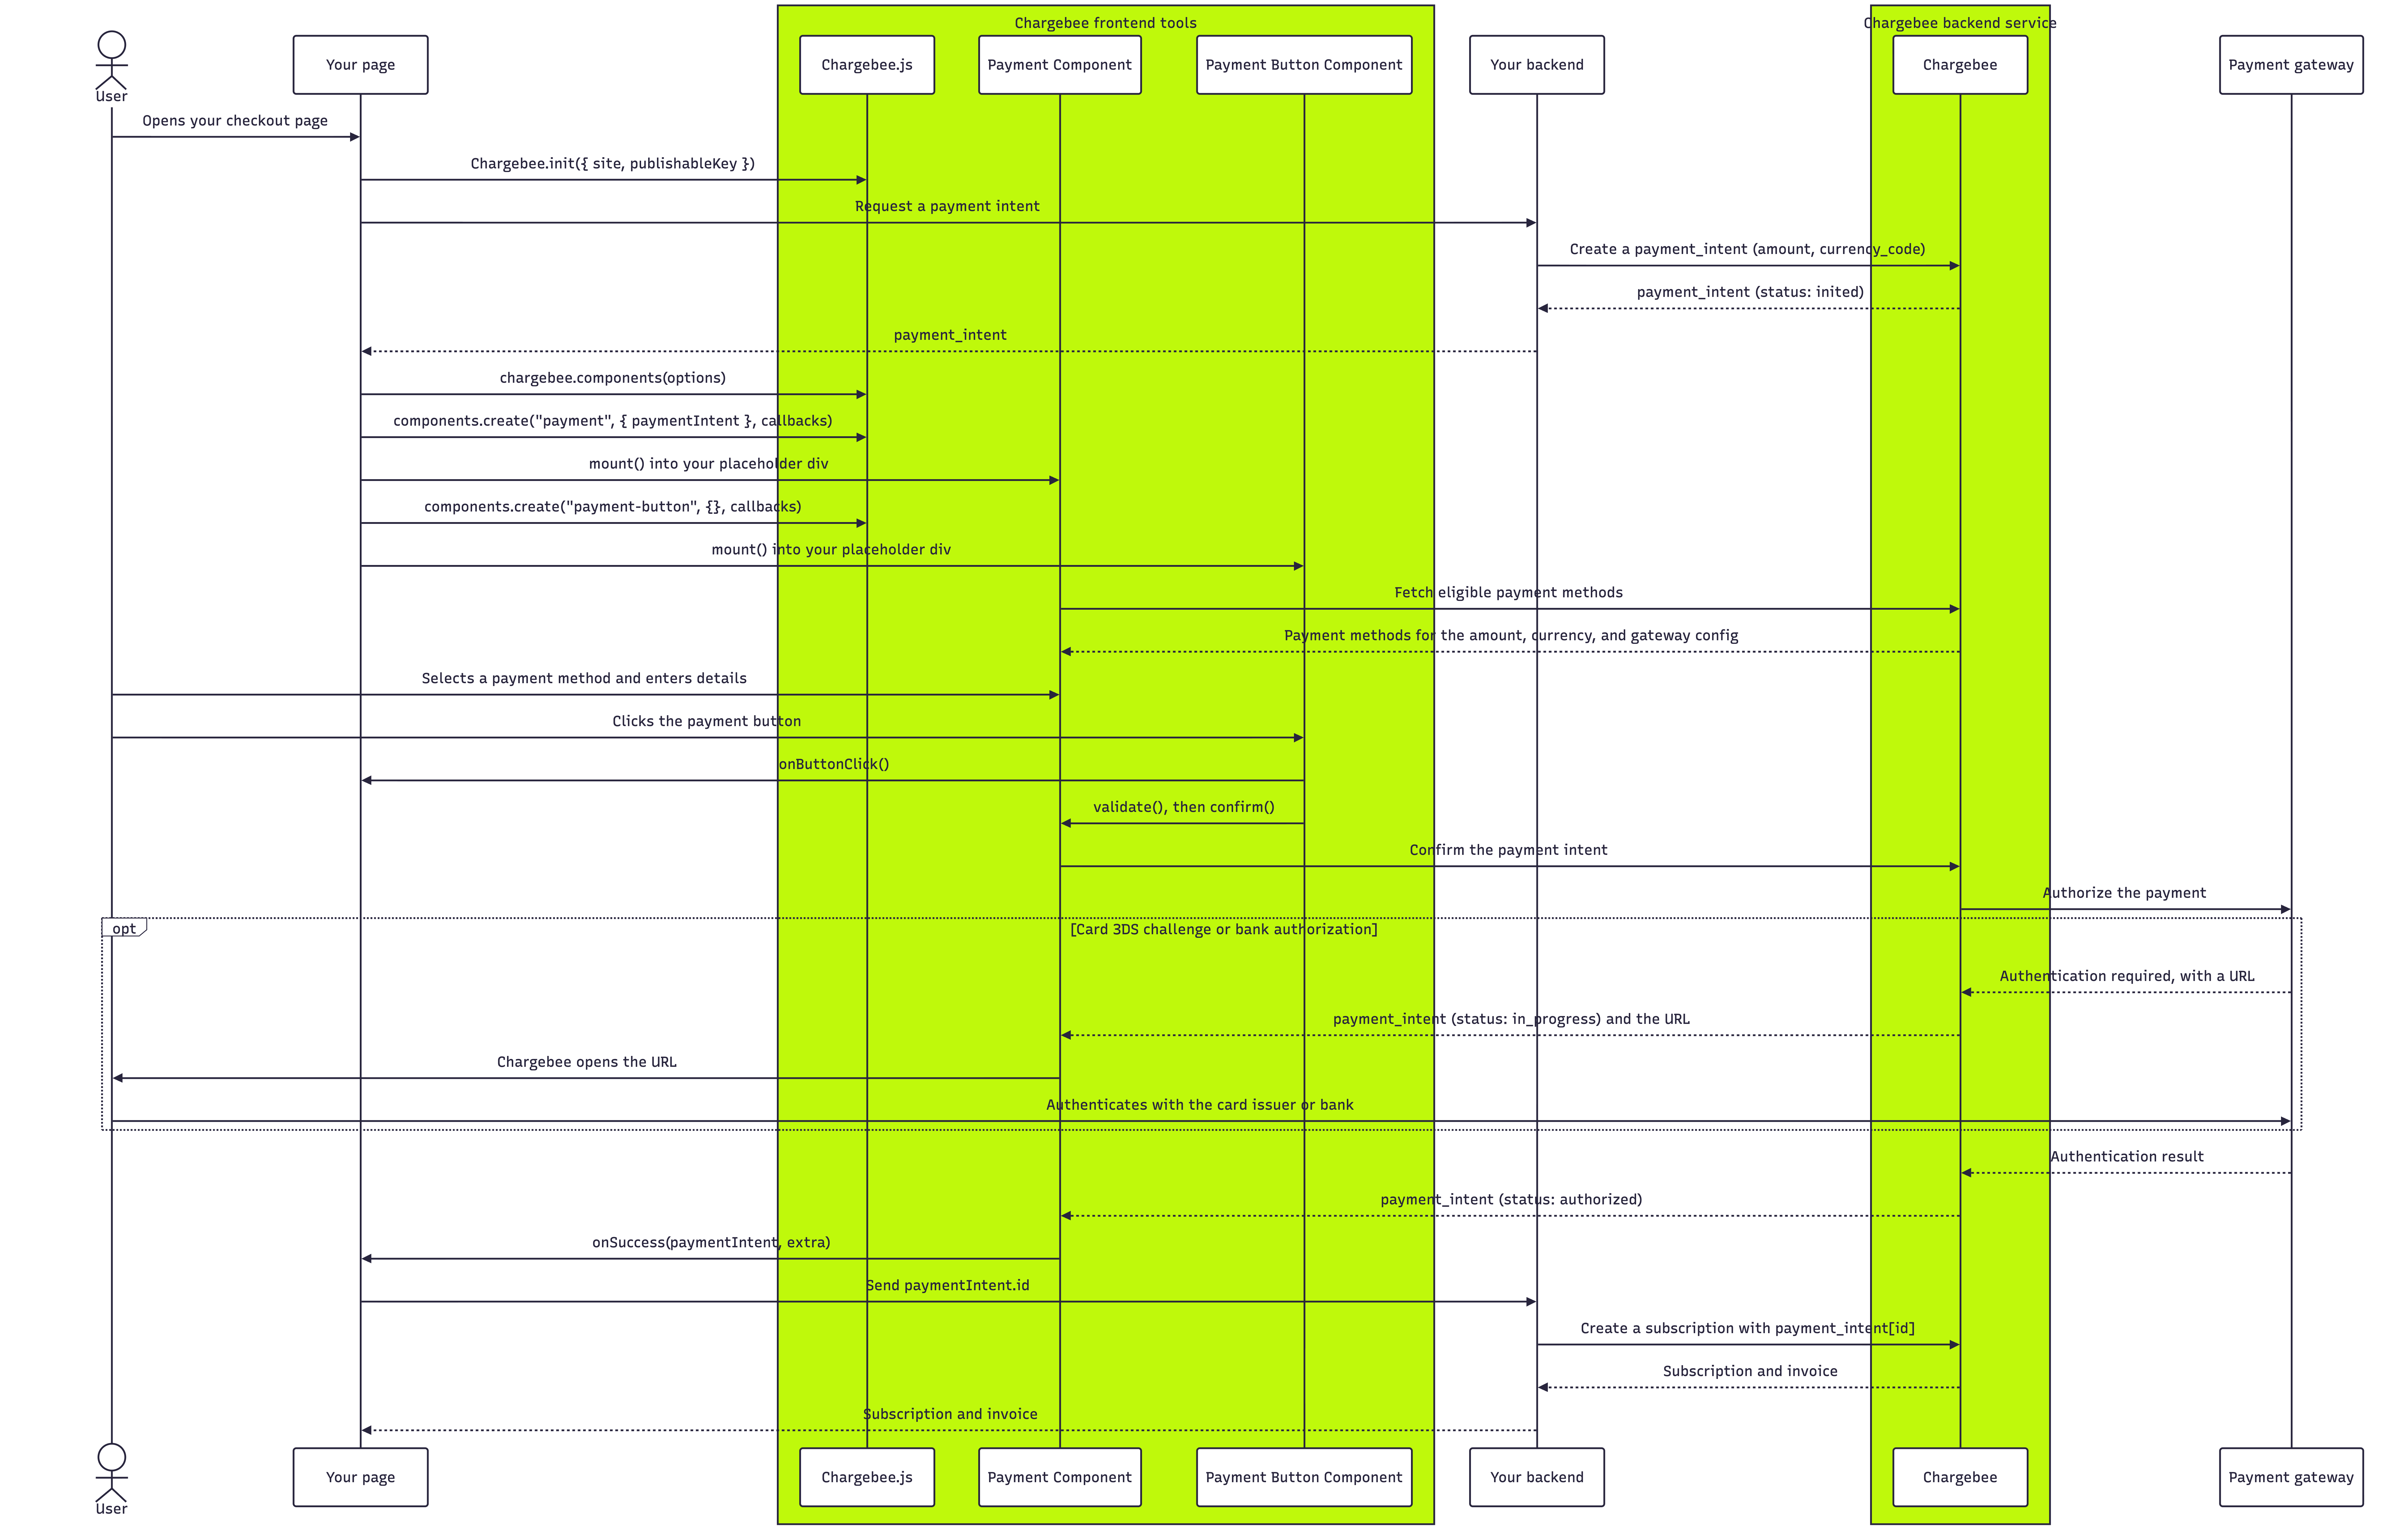
If authorization fails at any point, the Payment Component calls onError() instead of onSuccess(), and the customer can correct the details and try again.
Note the following about the participants:
- Your page never touches payment details. It creates and mounts the components, then reacts to their callbacks.
- Chargebee.js is the library you load from
https://js.chargebee.com/v2/chargebee.js. It creates the components and loads them from Chargebee's domain. - The Payment Component renders the payment methods and collects the details inside an
<iframe>hosted on Chargebee's domain, which is what keeps the data out of your PCI scope. - The Payment Button Component is optional. If you omit it, use your own button and call
validate()andconfirm()yourself. - Your backend holds your full-access API key. It creates the
payment_intentand, after authorization, creates the subscription. - The payment gateway is where Chargebee sends the payment. When a card needs 3D Secure or a bank payment needs authorization, the gateway returns a URL and Chargebee opens it for the customer.
For the code behind each step, see the quickstart code walkthrough.
# Quickstart
Download a sample app (opens new window) and refer to its code walkthrough to quickly implement Payment Components.
# Key benefits
- Simple integration: Integrate just once to support multiple payment methods across various payment gateways. This helps you expand globally and increase revenue, without additional development cost.
- PCI compliant: Payment Components securely handle card data within an iframe hosted on Chargebee's domain, ensuring that your servers never process or store your customers' payment information. This reduces your PCI compliance requirements significantly.
- Advanced routing support: Route payments through specific gateways based on rules defined in Chargebee Billing. If you have multiple payment gateways configured, Advanced Routing lets you optimize payment flow for better reliability, cost-efficiency, and regional coverage.
- Customizable UI and branding: Easily tailor the user interface, layout, and styling to match your website's design, creating a seamless and branded payment experience that reduces friction and increases conversion.
- Responsive: Payment Components are responsive across devices and screen sizes.
- Payment submission button: Includes an optional pre-built button that securely processes payments. You can place it anywhere in the UI layout and it dynamically adapts to the selected payment method.
- Additional form fields: Add extra form fields to collect more information during payment collection.
- Multi-language support: Support translations in multiple languages using the
localeoption. You can customize the translated text using the Chargebee Billing Language Pack. - Lifecycle callbacks: Payment Components expose callbacks for ready, method change, button click, success, and error so you can hook validation, analytics, and tax updates into the payment flow. See the API reference.
# Use cases
The Chargebee Payment Components can be customized to suit different business needs.
Demo and playground
A Payment Components playground is available that includes an interactive demo, payment method availability tracker, and configuration examples. Contact Chargebee Support for access.
Some common business use cases are demonstrated below.
# Show payment methods based on cart value
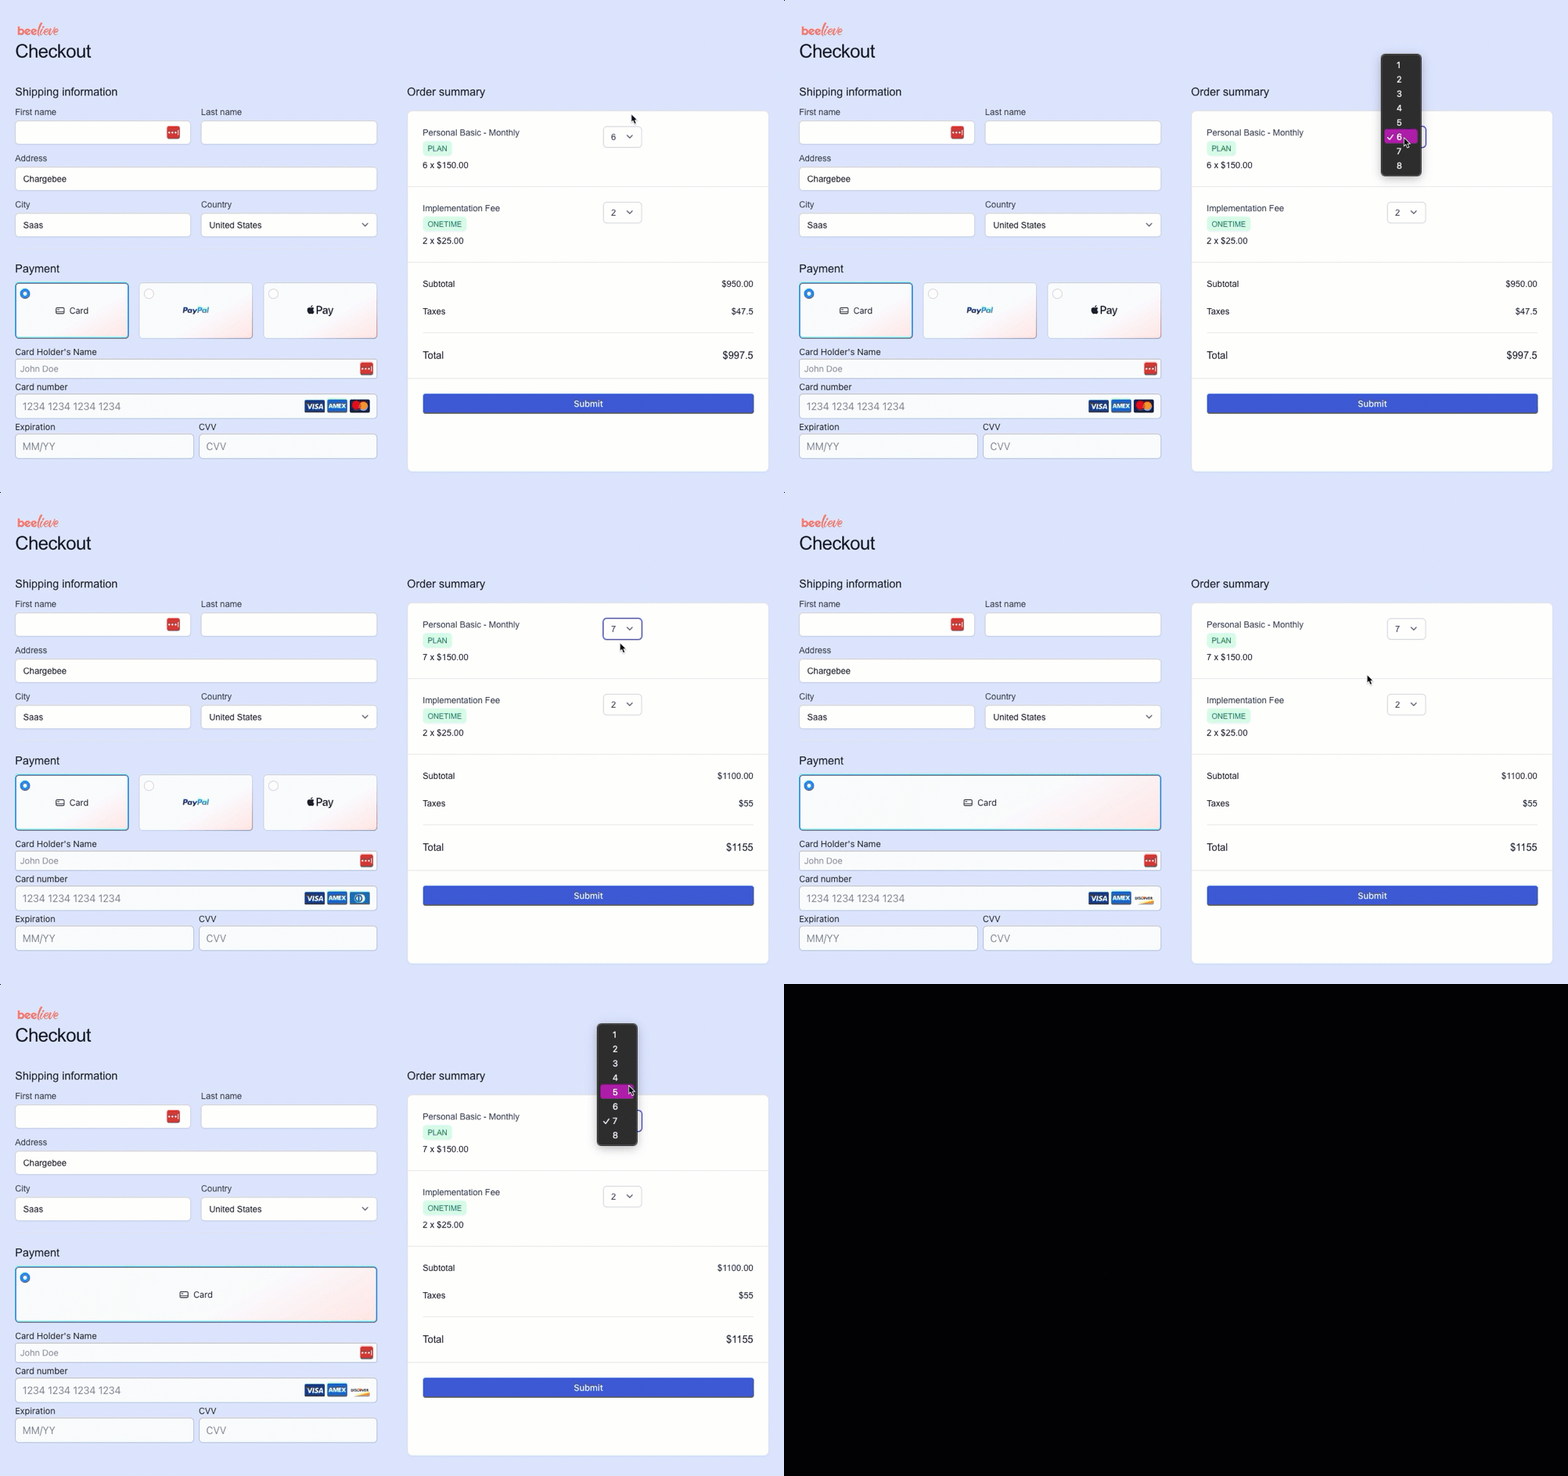
Below is a checkout page where the Chargebee Payment Component is rendered in the lower left quadrant under the heading Payment. In this demo, the available payment methods and their sort order change based on the cart value.
Cart value-based payment methods
# Show payment methods based on region
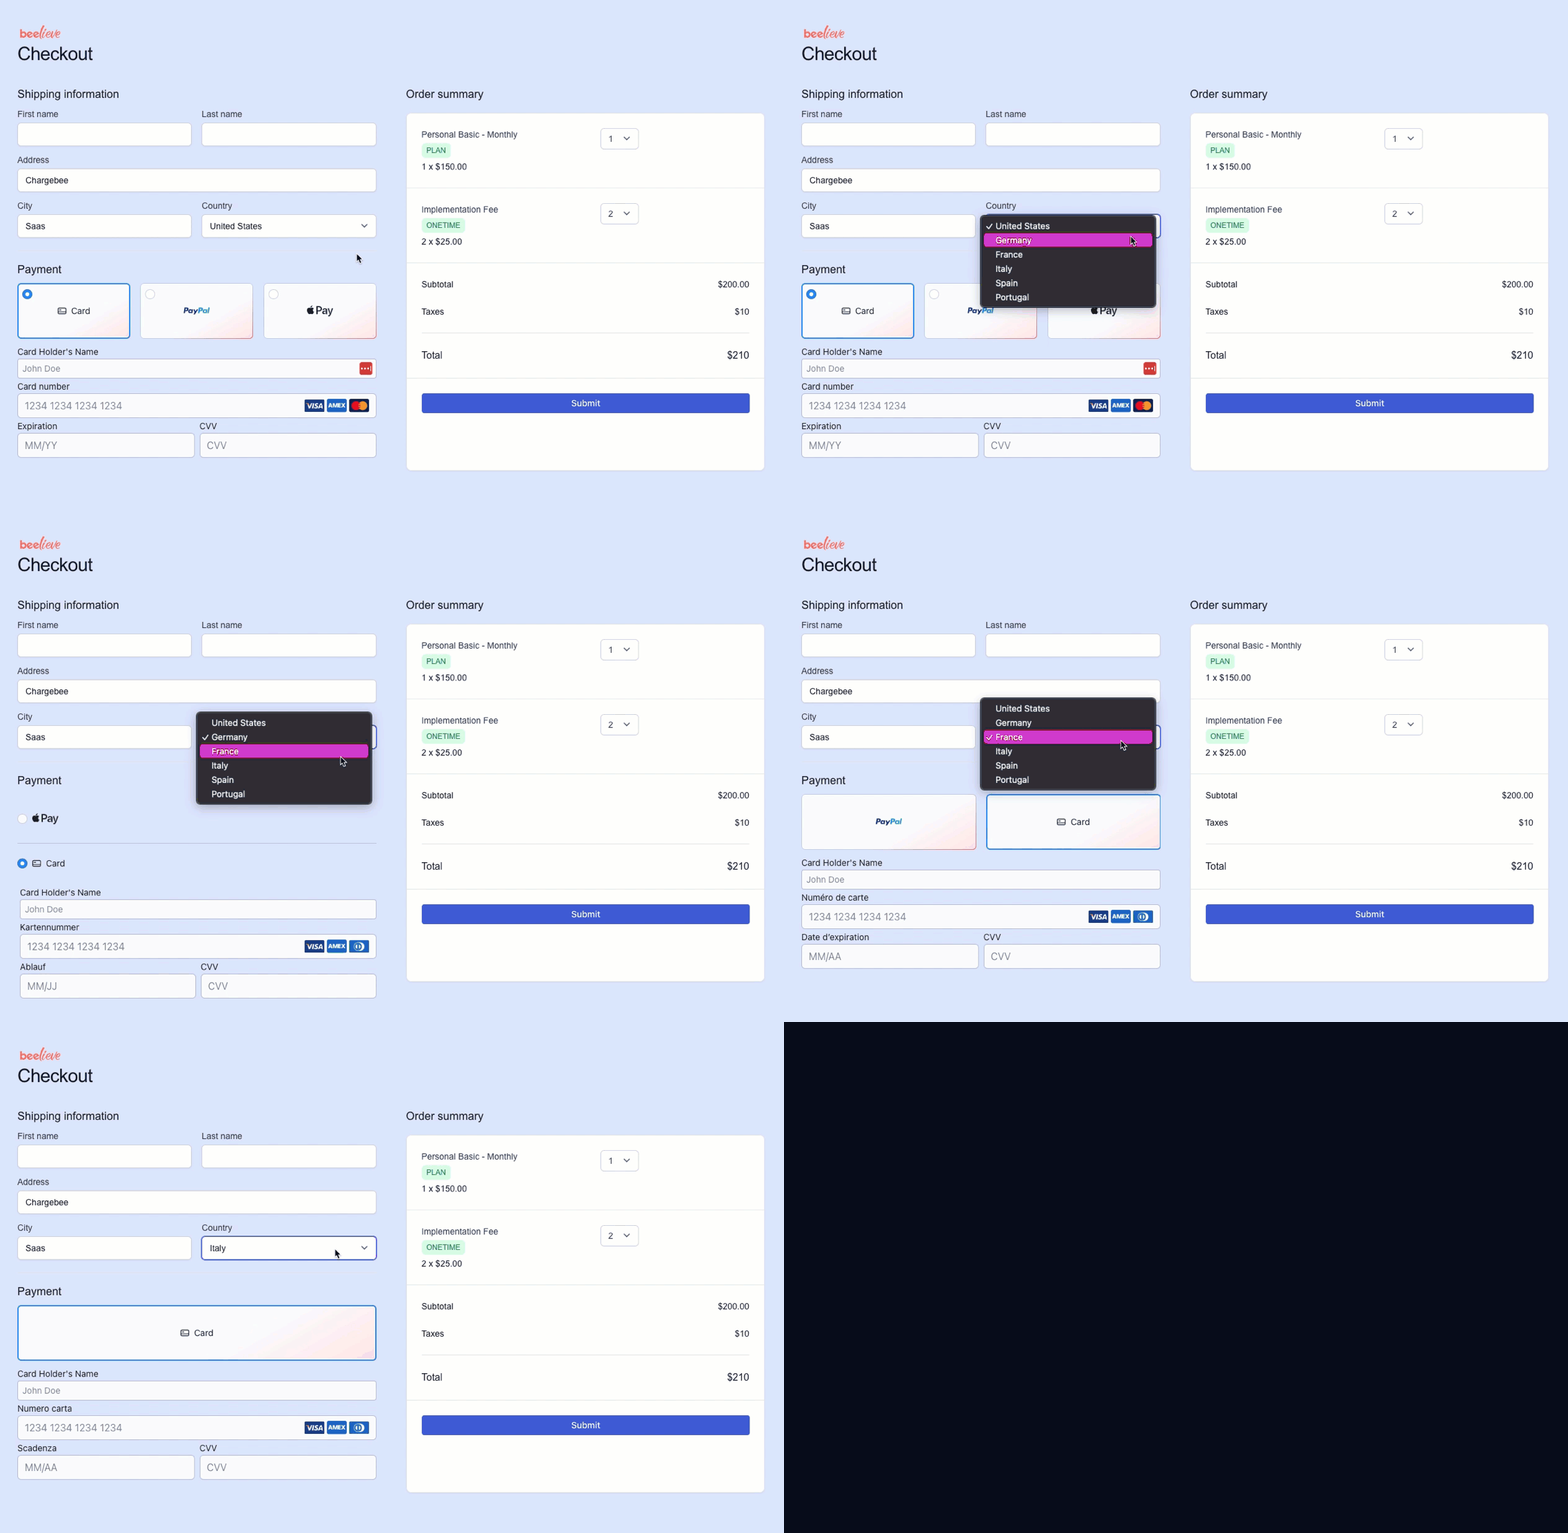
In this demo, the available payment methods and their sort order change based on the country selected by the user.
Region-based payment methods
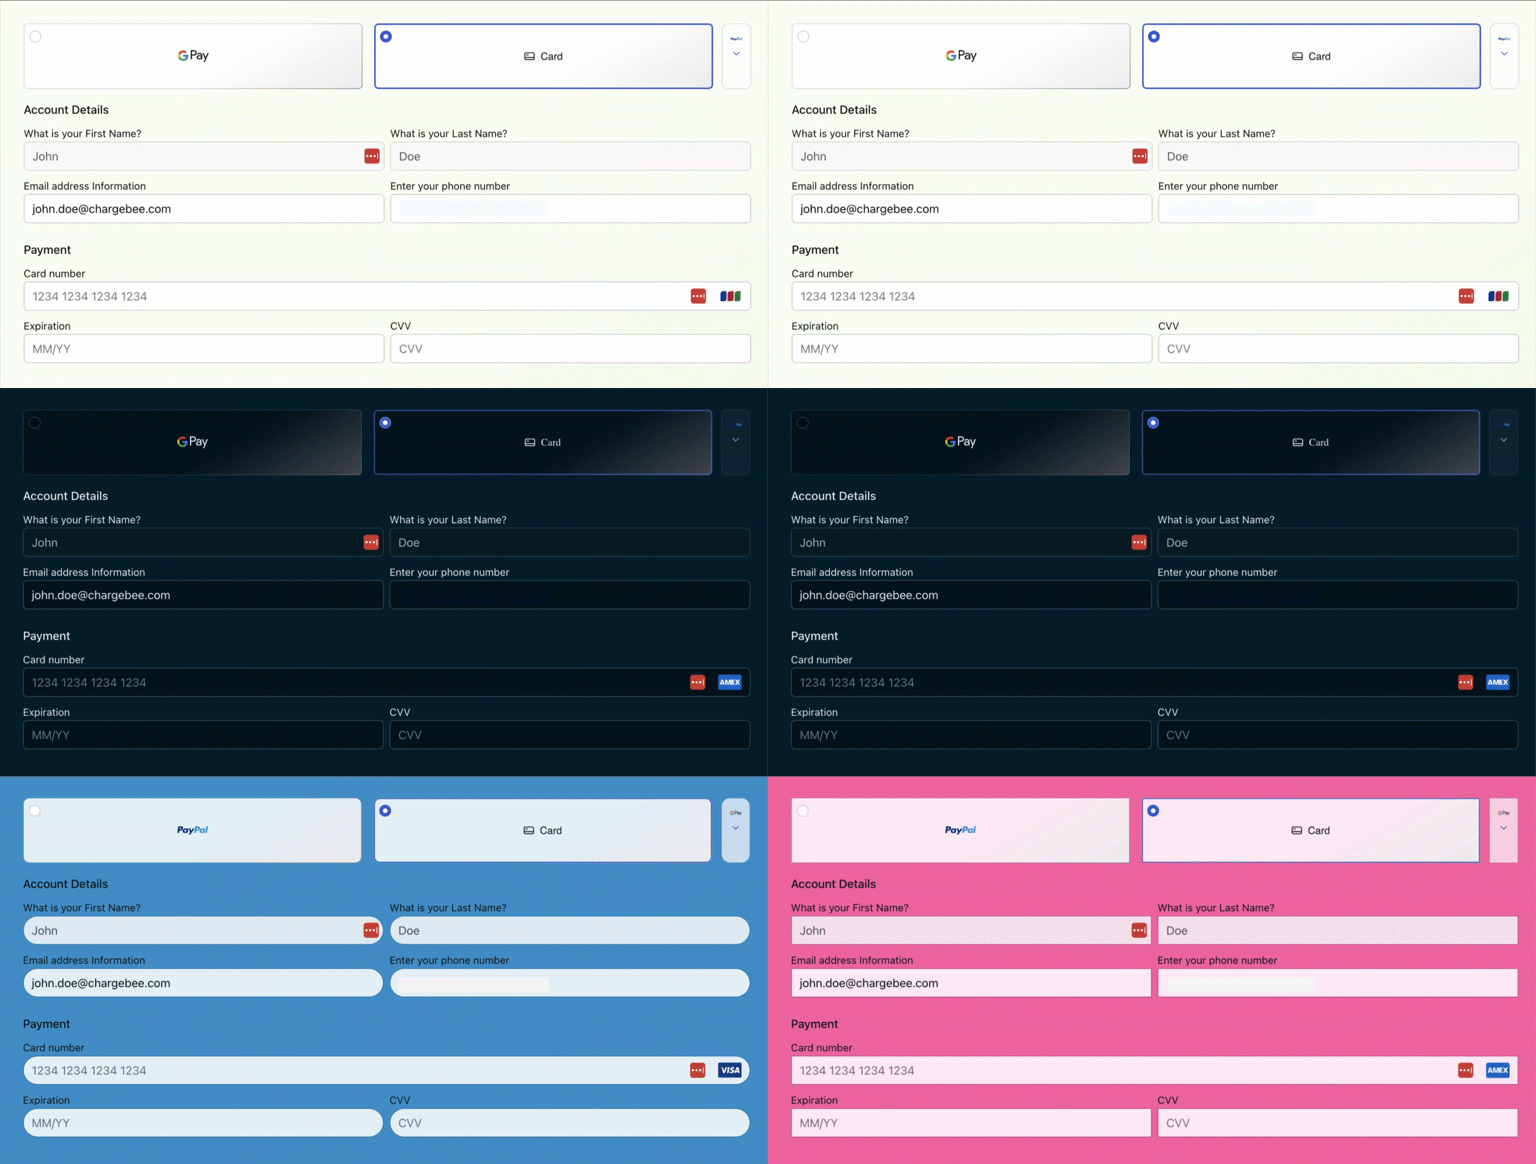
# Style customizations
Payment Components offer granular styling and presentation options to match your website design.
# Styling API
To customize the styling, use the style parameter in the following scenarios:
- When creating the
Componentsobject. (This styling is inherited by all Payment Components and Payment Button Components associated with this object.) - When creating or updating a Payment Component.
- When creating or updating a Payment Button Component.
Style customization examples
More use cases
Check out Payment Components Use Cases for more scenarios using Payment Components.
# Supported payment methods
Payment Components currently support the following payment methods:
# Cards
Payment Components support card payments (opens new window).
Non-3D Secure Payments
Among the gateways (opens new window) that support non-3D Secure (opens new window) payment flows, the following are not yet supported: Authorize.net (opens new window), Sage Pay (opens new window), Vantiv (opens new window), and all gateways integrated via Spreedly.
# 3D Secure and SCA
Payment Components handle 3D Secure (opens new window) (3DS) authentication for you. When you call confirm(), or when the customer clicks the built-in Payment Button Component, the component performs the following steps:
- Sends the payment to your gateway.
- If the gateway requires 3DS, opens the challenge for the customer to authenticate with their card issuer.
- Moves the
payment_intentstatus frominitedthroughin_progresstoauthorized. - Calls your
onSuccess()callback with the authorizedpayment_intent, oronError()if authentication or authorization fails.
Don't use the 3DS Helper with Payment Components
Chargebee.js also provides a separate 3DS Helper module with functions such as load3DSHandler() and handleCardPayment(). That module is for other integration styles, including the Card component, gateway hosted fields, permanent tokens, and raw card details. Payment Components run 3DS internally, so don't call the 3DS Helper alongside them.
To try the challenge flow yourself, see Test the 3D Secure challenge.
# Direct Debit
All direct debit payment methods (opens new window), except ACH via QuickBooks Payments (opens new window), are supported by Payment Components.
ACH is supported for Chargebee-supported ACH gateways, including Authorize.Net (opens new window), GoCardless (opens new window), CyberSource (opens new window), Chargebee Payments (opens new window), BlueSnap (opens new window), Braintree (opens new window), Adyen (opens new window), Vantiv (opens new window), Checkout.com (opens new window), and Stripe (opens new window).
# Wallets
When using wallets, the customer authenticates with the wallet provider. Payment Components handle those redirects internally. The following wallets are supported by Payment Components:
- Apple Pay: Supported via Adyen (opens new window), Checkout.com (opens new window), Braintree (opens new window), and Stripe (opens new window) gateways.
- Google Pay: Supported via Adyen (opens new window), Bluesnap (opens new window), Braintree (opens new window), and Stripe (opens new window) gateways.
- PayPal: Supported via Adyen (opens new window), Braintree (opens new window), and Paypal (opens new window) gateways.
- Venmo: Supported only via Braintree (opens new window) gateway.
- Amazon Payments: Supported only via Amazon Pay (opens new window) gateway.
# Bank-Based Payments
When using bank-based methods, the customer authenticates with their bank. Payment Components handle those redirects internally. The following bank-based methods are supported by Payment Components:
- iDEAL: Supported via Adyen (opens new window), Mollie (opens new window), and Stripe (opens new window) gateways.
- Bancontact: Supported via Adyen (opens new window), Checkout.com (opens new window), Mollie (opens new window), and Stripe (opens new window) gateways.
- Klarna Pay Now: Supported via Adyen (opens new window) gateway.
- UPI: Supported via Razorpay (opens new window) gateway.
- Netbanking E-Mandates (India): Supported via Razorpay (opens new window) gateway.
- Online Banking Poland: Supported via Adyen (opens new window).
# Open Banking Private Beta
The following payment methods are supported through Open Banking via GoCardless (opens new window).
- PayTo
- SEPA Instant Transfer
- Faster Payments
# Offline payment methods
Payment Components support these offline payment methods (opens new window):
- Cash
- Check
- Bank Transfer
# Limitations
- Adding an info icon or tooltip next to the card CVV field is not supported.
- Loading custom font files is not supported. You can still set font family names through the styling API. They are loaded only when the fonts are available on the customer's device.
- Because Payment Components run inside a cross-origin iframe, parent pages cannot receive per-keystroke or field-change events from inside payment components. Use callbacks such as
onPaymentMethodChange,onButtonClick,onSuccess, andonErrorfor analytics instead. See Track typing or field changes in Payment Components.
# Troubleshooting
See Payment Components Troubleshooting if Payment Components fail to load or wallet buttons do not render.
# JS API reference
See the Payment Components API reference for detailed documentation on the Payment Components API.
# Contact support
For onboarding, migration, or production go-live help, contact Chargebee Support (opens new window). Include the following details when you contact Support:
- Your site name (opens new window)
- Environment (opens new window) (Sandbox or Production)
- Gateway (opens new window)
- Payment method (opens new window)
- Steps to reproduce
- Screenshots or logs when available
