Users and Roles
Go to Settings > Team Members to add, remove, or modify users in your Chargebee account.
You can assign users different roles in your site. These roles define the level of access and job functions each user has. In other words, a role allows a user to perform specific tasks within your Chargebee site.
This article is for sites where Multi Business Entity (MBE) is not enabled. For MBE-enabled sites, refer to this section in the MBE overview article.
Creating a New User
You can create and add users to your Chargebee site, depending on your plan.
Note
- For pricing information, see the Plans and Pricing page.
- Chargebee user account passwords must be updated every 90 days, and the new password cannot match any of the last four passwords.
To invite a user to your site:
- Go to Settings > Team Members.
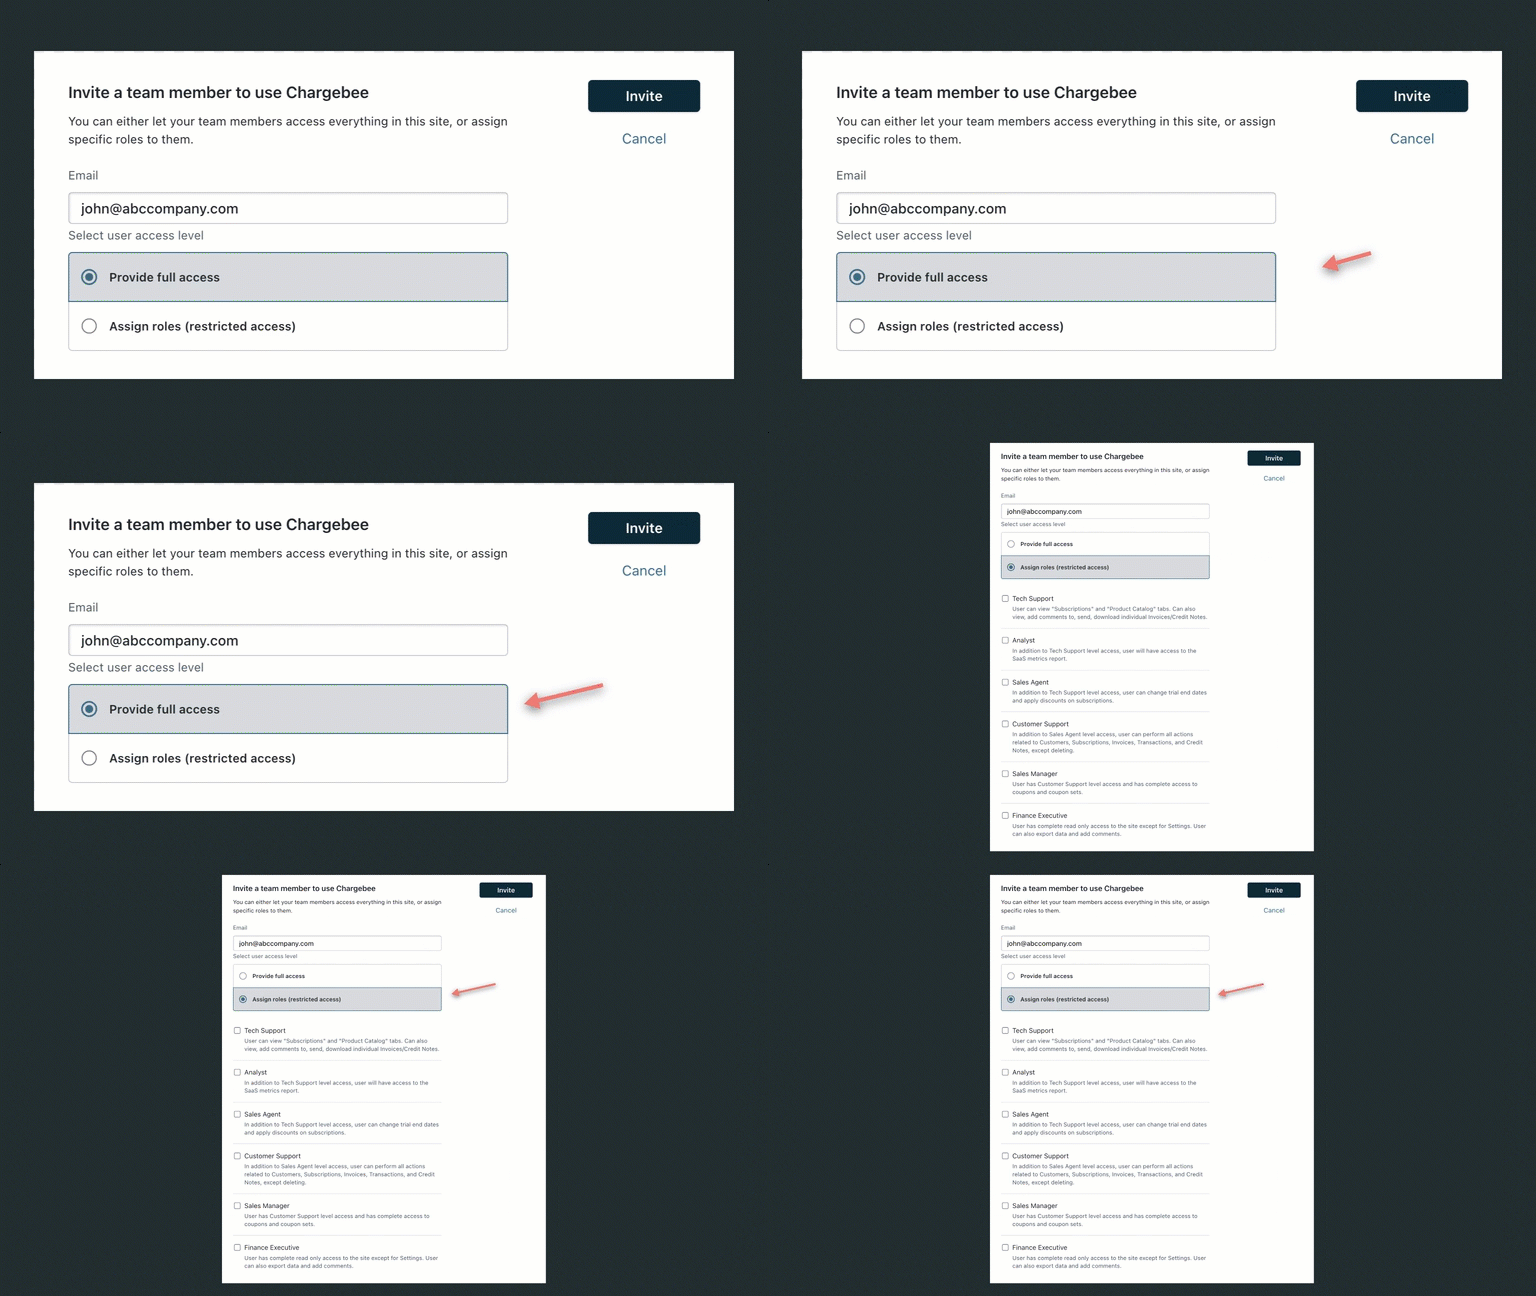
- Click Invite Members.
- Select the role you want to assign to the new user. The role defines the user's access level.
- Click to send the invite.
The available user roles are:
- Tech Support
- Analyst
- Sales Agent
- Customer Support
- Sales Manager
- Finance Executive
- Developer
- Owner (automatically assigned to the creator of the site)
Each of these roles has specific restrictions. To give a user full access to your Chargebee site, select the Provide Full Access option when sending the invitation. These users are called admins in Chargebee.
Note
You can add custom roles to your Chargebee site. To learn more, see Managing Custom Roles.
The user receives an email notification with a link to activate their account (or create one, if they have not signed up for Chargebee yet). Their account stays in the Pending Invites list until they activate it. To resend or cancel an invitation before it is accepted, see Managing Pending Invitations.
Users have separate access for the TEST and LIVE sites. A user invited from the TEST site cannot access the LIVE site, and you must invite them from the LIVE site separately to grant access there.
After you create users, you can edit a user's profile at any time to change their role. You can also assign a user more than one role. For example, a user can be both a finance executive and a customer support user, and they have access to the functionality available for both roles.
Deleting a User
You can remove a user when they no longer need access to your Chargebee Billing site. Removing a user is different from revoking a pending invitation: use this procedure for users who have already activated their account. To cancel an invitation that has not been accepted yet, see Managing Pending Invitations.
Only admins and the site owner can remove users.
To remove a user:
- Go to Settings > Team Members.
- Find the user you want to remove.
- Click Remove next to the user's name.
When you remove a user, they immediately lose access to the site. Access is per-site, so removing a user from the TEST site does not remove them from the LIVE site—remove them from each site separately. If the user does not belong to any other Chargebee site, their Chargebee account is also deleted. On the LIVE site, the site owner receives an email notification confirming that the user was removed.
You cannot remove the site owner directly. To remove the current owner's access, first transfer ownership to another user (see Changing Account Ownership), then remove them.
Managing Pending Invitations
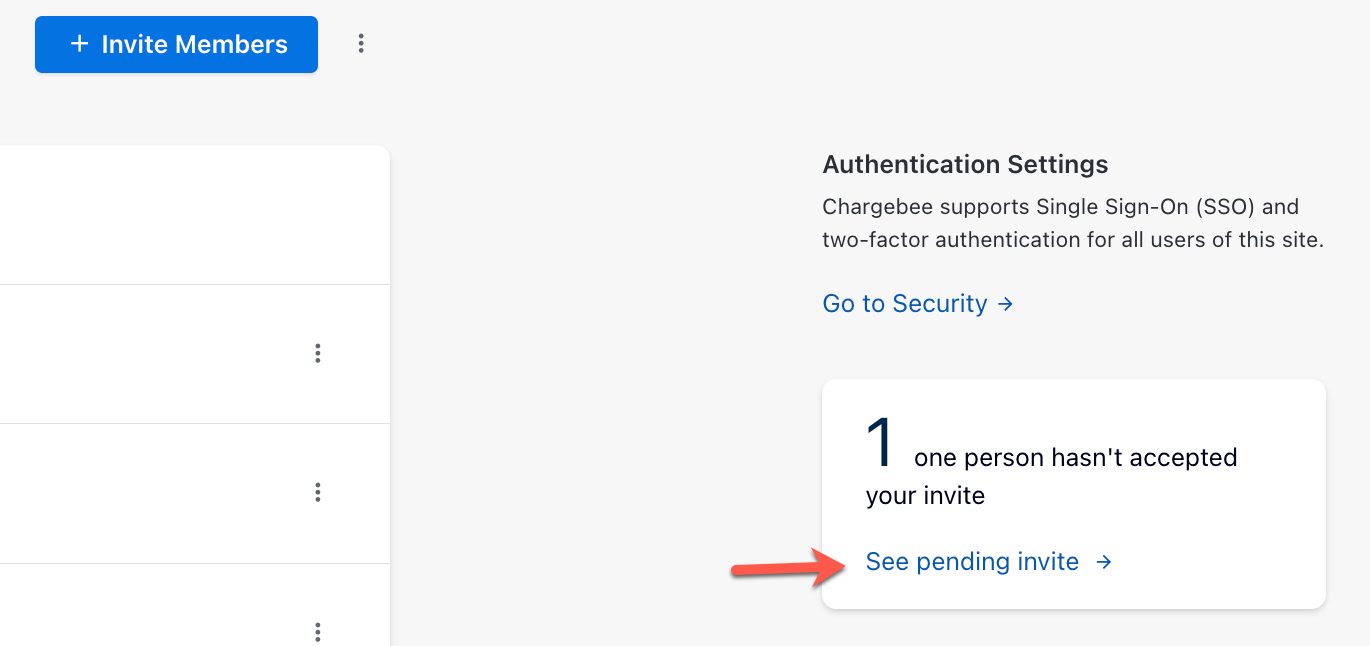
After you invite a user, their invitation stays in the Pending Invites list until they activate their account. From this list, you can view invitations that have not been accepted yet, and resend or revoke them.
Only admins and the site owner can view and manage pending invitations.
To view pending invitations:
- Go to Settings > Team Members.
- Click See pending invite to view all invitations that have not been accepted yet.
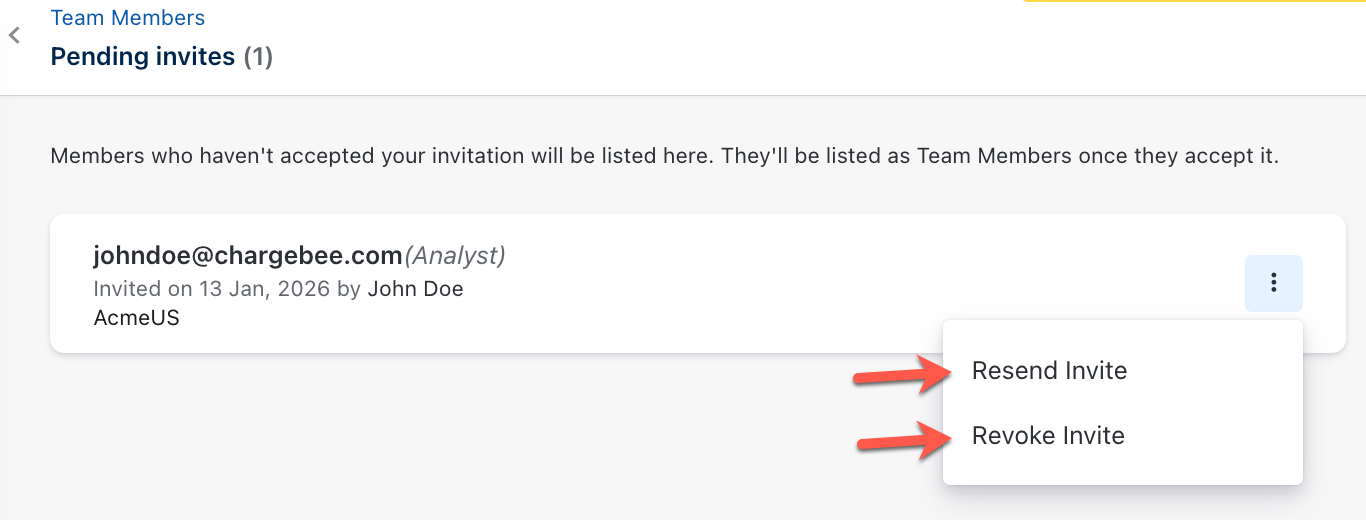
For each pending invitation, you can:
- Resend the invitation: Click Resend Invite to send the invitation email to the user again.
- Revoke the invitation: Click Revoke Invite to cancel the invitation. The user can no longer use the original invitation link to join the site.
A user stays in the Pending Invites list until they activate their account. After they activate it, they move to the Team Members list as an active user.
Changing Account Ownership
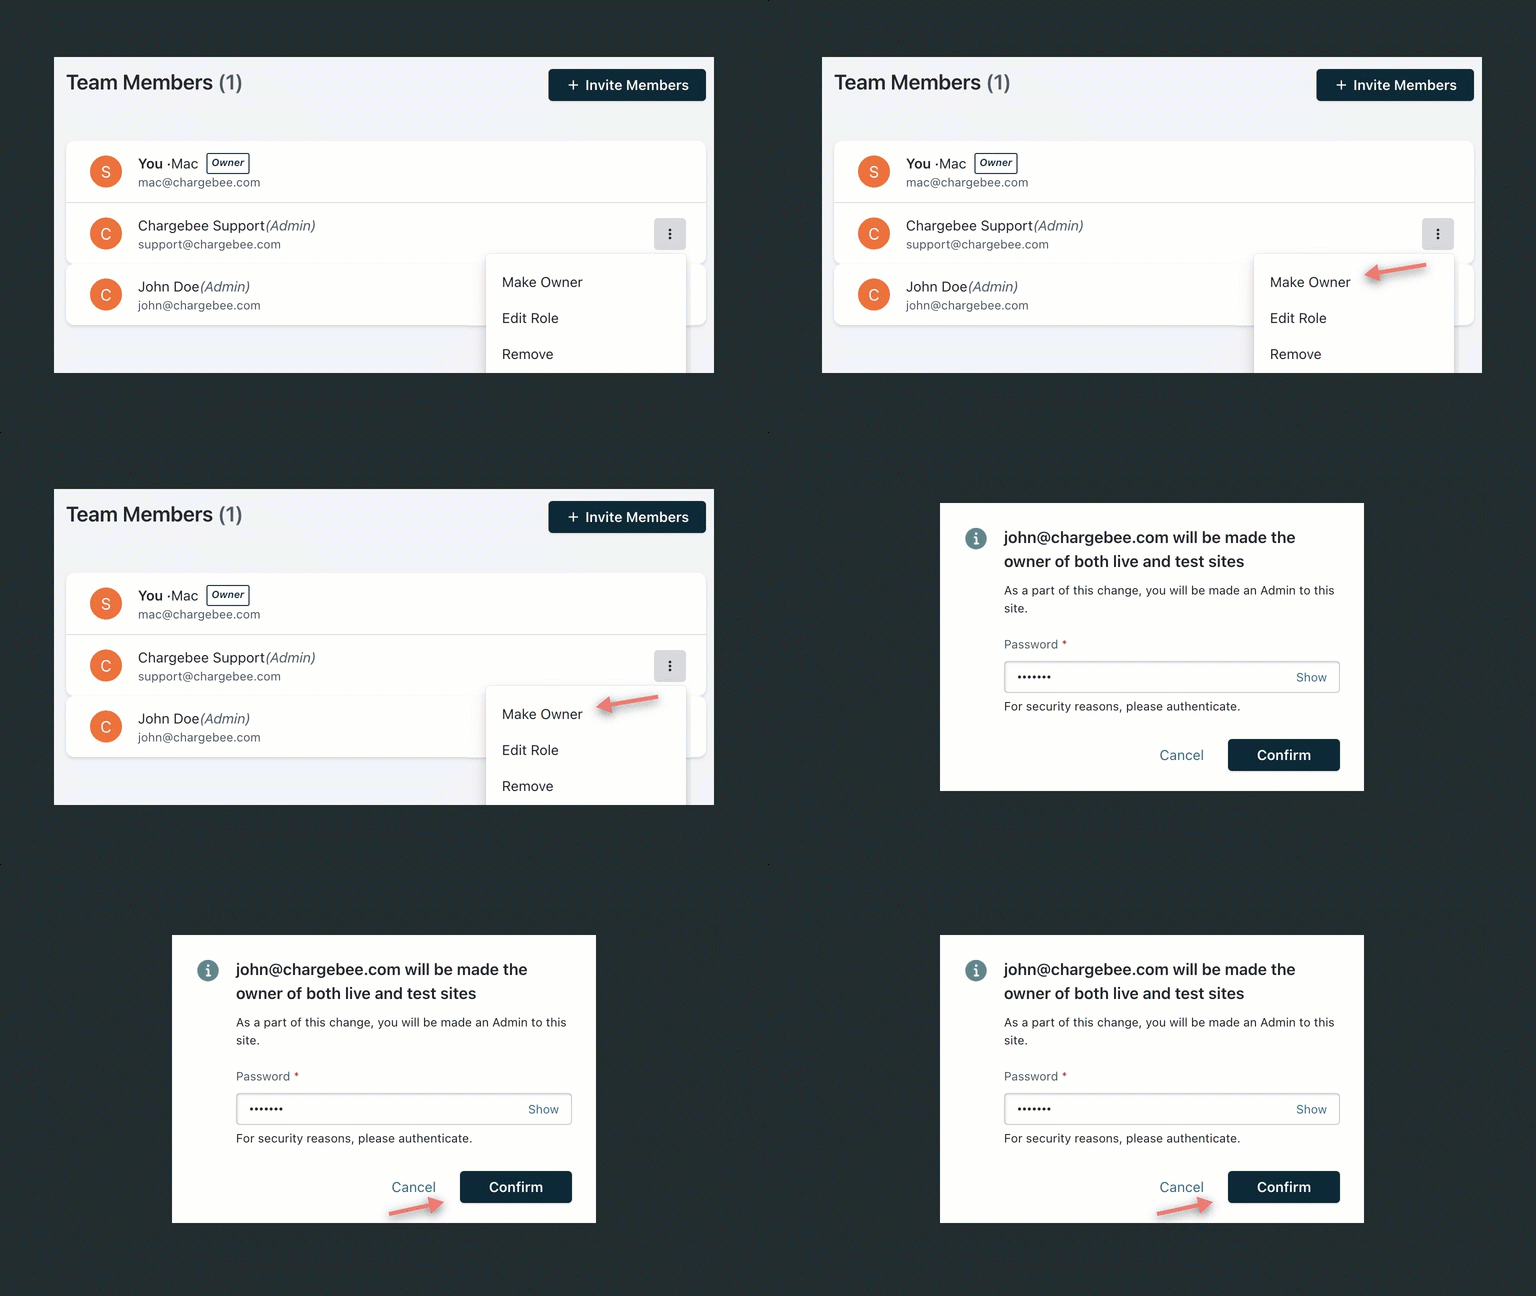
Chargebee supports transferring site ownership. The current owner can transfer ownership to another user. This is a permanent change that reflects in both the TEST and LIVE sites (even if the LIVE site has not been enabled yet).
After ownership is changed, the previous owner's role is restricted to admin in both the TEST and LIVE sites. If the LIVE site has not been enabled, the previous owner becomes the admin for the TEST site only.
Only the current owner can change account ownership, by selecting the Make Owner option next to each user listed on the Settings > Team Members page.
Note
- Account ownership can be changed from both the TEST and LIVE sites.
- Chargebee support is added to the TEST site by default and cannot be made the site owner, even if it appears in the list of users.
Enforcing User Authentication Policy
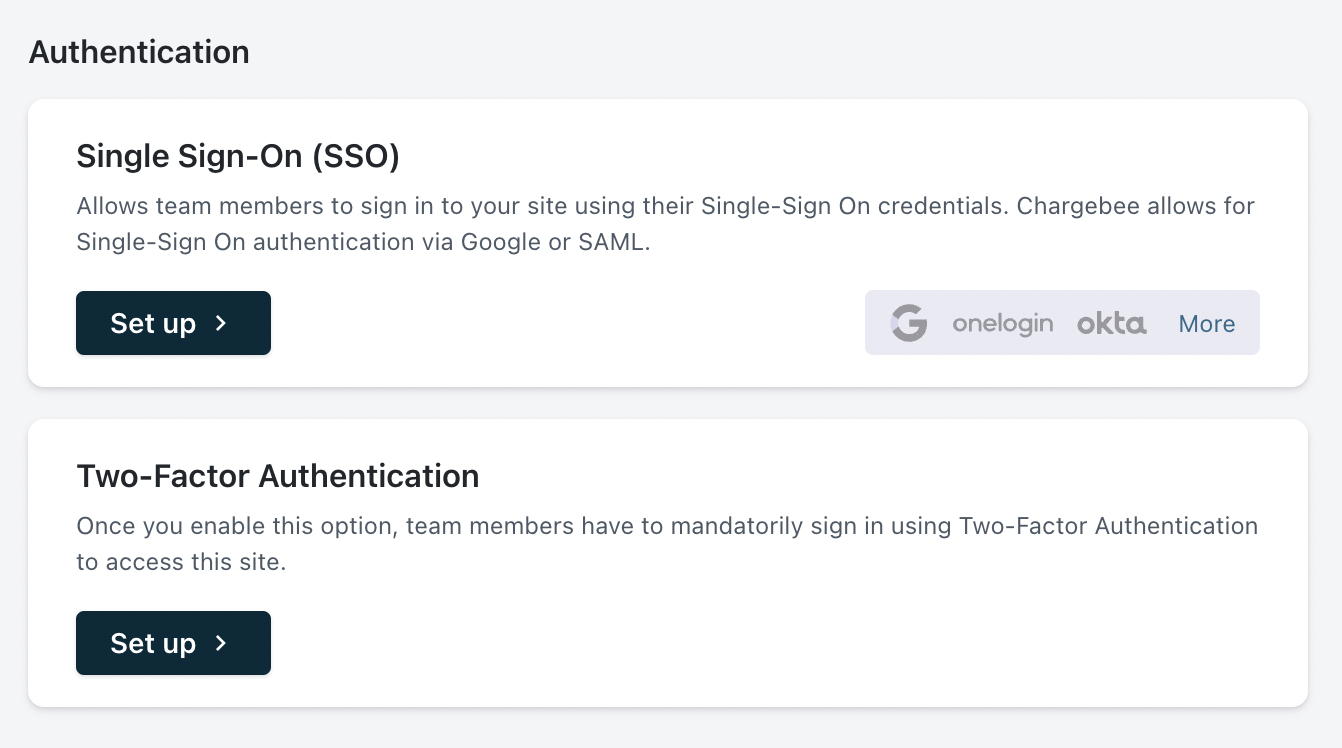
When you have multiple users, enforce a strict authentication policy to secure your site. Chargebee allows you to configure authentication settings for your team.
To configure these settings, log in to your Chargebee site as an admin and go to Settings > Security.
Use the following options to enforce your authentication policy:
-
Mandatory sign-in via Google account: Require every user to log in using Google single sign-on. With this option, users cannot access the site without authenticating with their Google accounts. This is also helpful for secure access when a team member leaves your organization, so you do not have to remember to disable a user manually.
-
Mandatory sign-in via SAML: Require every user to log in using SAML. With this option, users authenticate using your organization's Identity Provider.
-
Mandatory sign-in using a six-digit code (Two-factor authentication): Require every user to log in using 2FA. With this option, users are prompted for a unique six-digit code (valid once) every time they sign in.
-
You can make both sign-in methods mandatory by enabling both options in the settings. In this case, every user must authenticate using both their Google account and a six-digit code to access the site.
For a detailed review of the 2FA feature and the sign-up steps, see our Two-Factor Authentication (2FA) page.
Managing Custom Roles
If the predefined roles in Chargebee don't grant the privileges you want to assign to a user, you can create a custom role. Each custom role can include one or more privileges that let users with that role perform specific tasks as needed.
To add new customized user roles to your Chargebee account, contact support.
You can create custom roles and define actions as per your requirements. You can configure privileges in the following modules:
- Customers
- Subscriptions (Invoices, Credit Notes, Orders, Transactions, Email Logs, Events)
- Product Catalog (Plans, Add-ons, Coupons)
Note
- Available only in selected plans. To learn more, visit the Plans and Pricing page.
- Chargebee allows a maximum of 18 custom roles.
- You cannot control access to actions in the Settings. This is a work-in-progress item and will be released later.
The new customized user roles are added along with Chargebee's predefined user roles. For example, in the image below, two custom user roles have been created: Custom Role 1 and Custom Role 2.
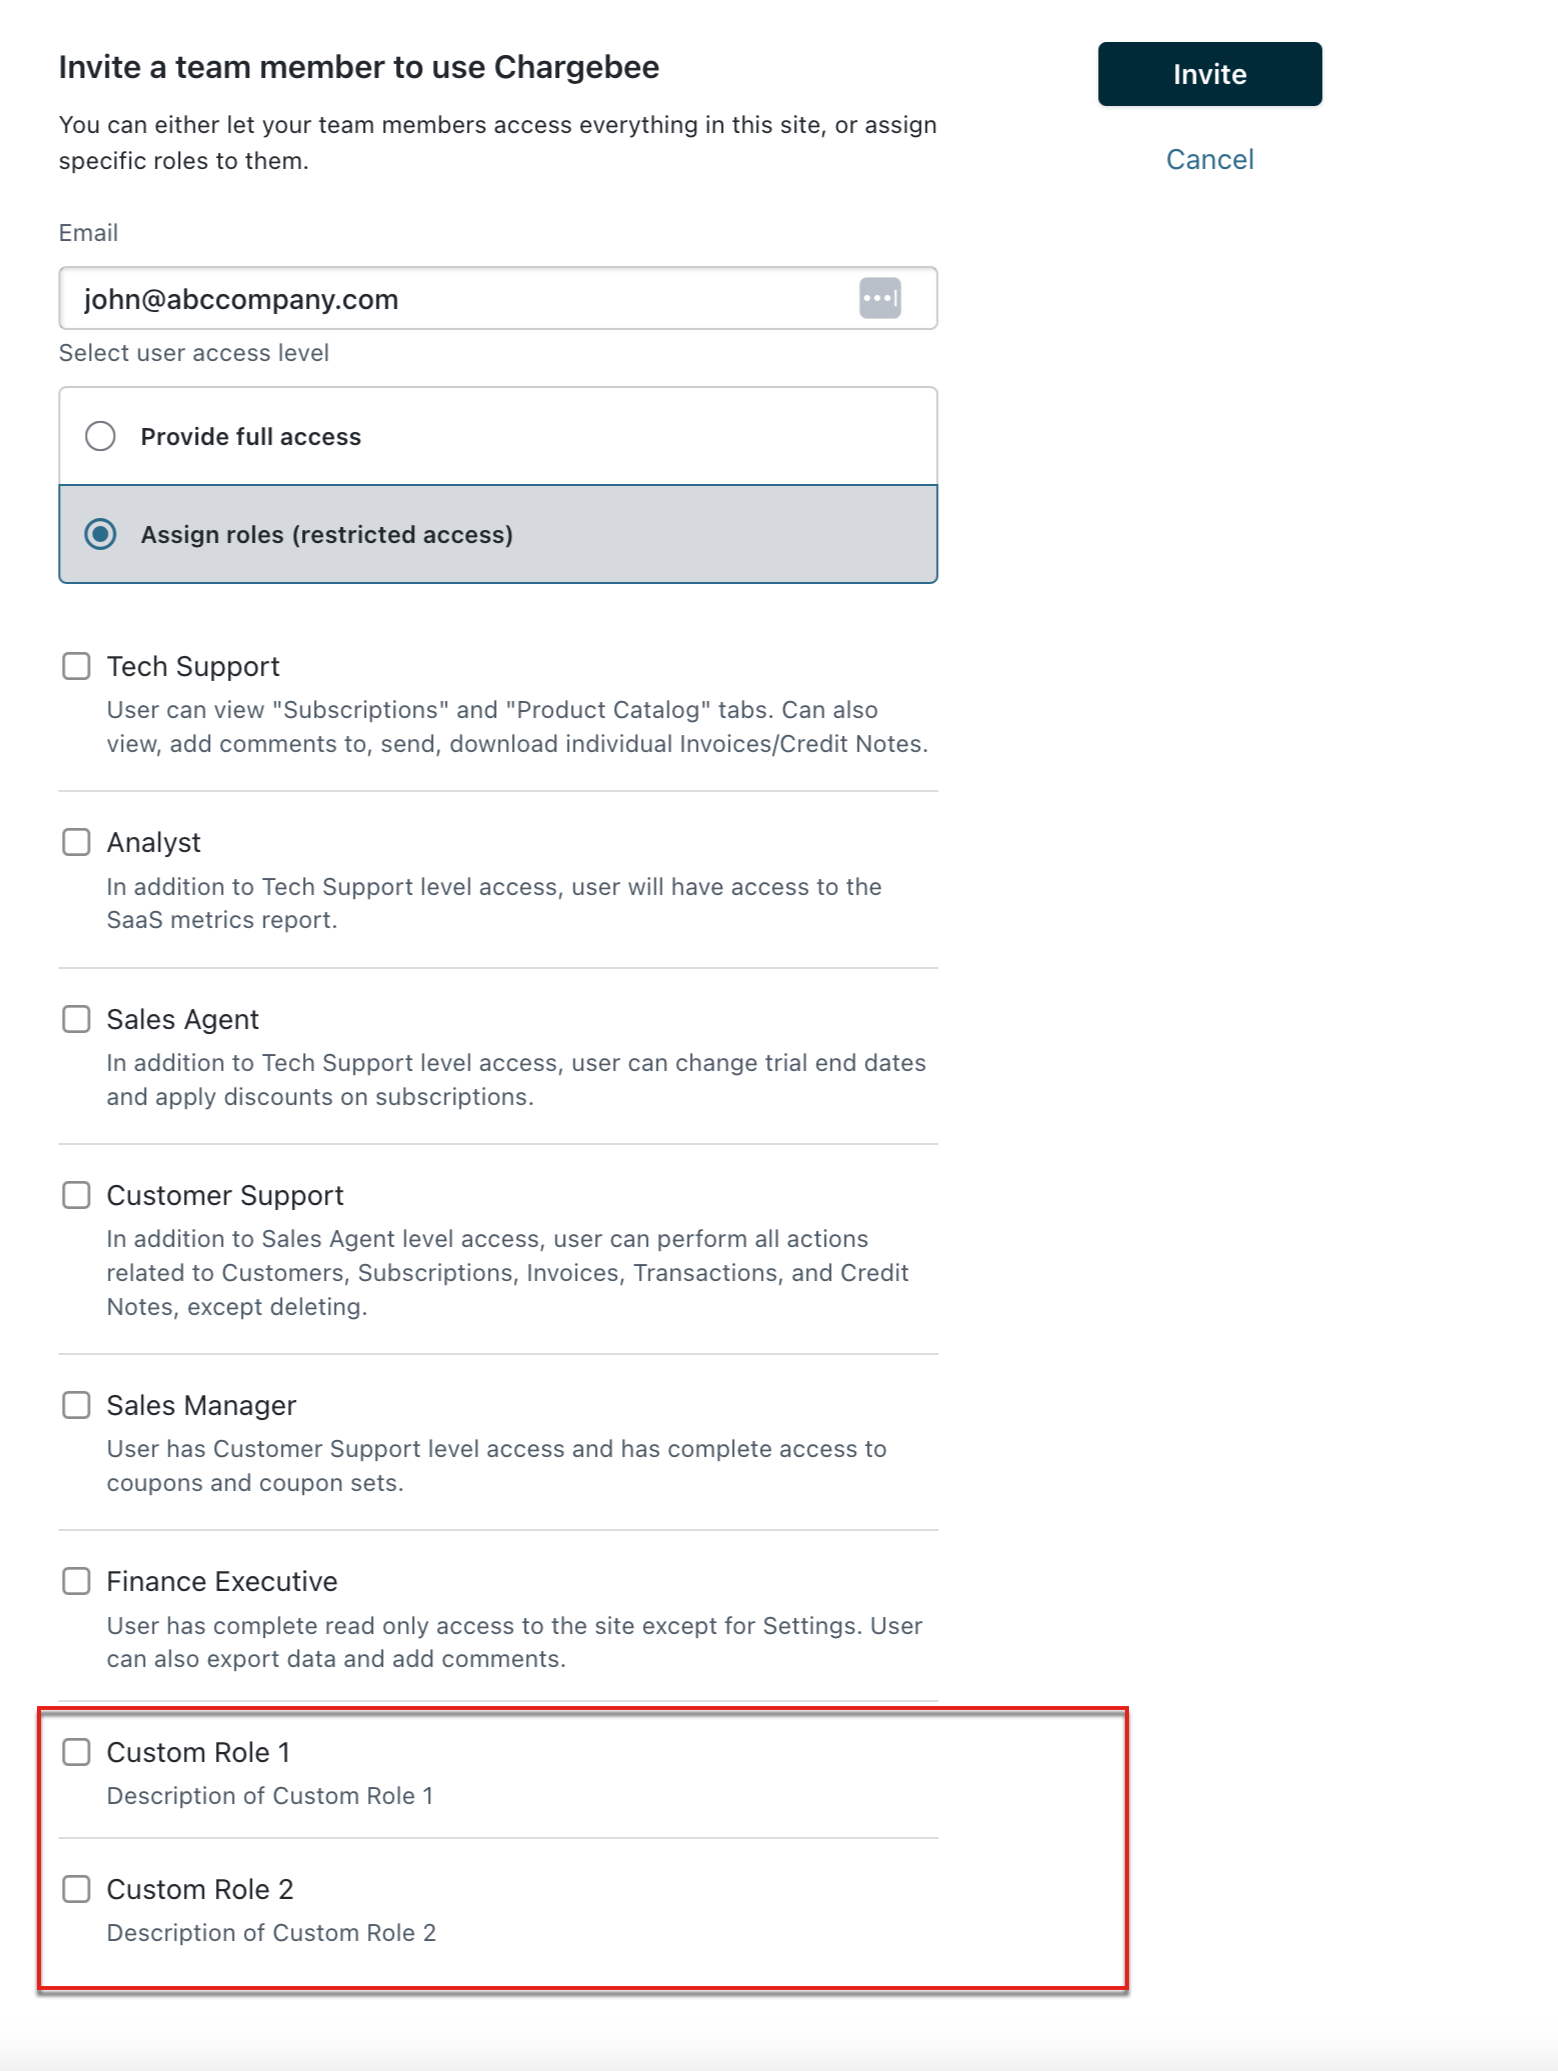
To assign a customized user role to a user, go to Settings > Team Members and assign the new role to the user.
You can assign more than one custom role to a user. If a user receives a permission error for an action, see the FAQ below.
FAQ
1. Why is a user blocked from an action when multiple custom roles are assigned?
If a user has multiple custom roles and receives a permission error for an action, it is likely because at least one assigned role explicitly denies that action.
When evaluating permissions across multiple roles, an action marked as not allowed in any role overrides the same action being allowed in another role. In short, explicit denials always take precedence.
To resolve this:
- Review all roles assigned to the user.
- Identify any role where the required action is set to not allowed.
- Either remove the denial from that role or unassign the conflicting role from the user.
Ensure that none of the user's assigned roles explicitly restrict the required action.
Was this article helpful?